March, 1986
The installation instructions packaged in the above kits contain a procedure which has been revised. The existing installation instructions for installing the connector rod screw are as follows:
⚠ 3. Tighten connector rod screw Ⓐ to a torque of 20 N·m (15 ft. lbs.) using a 9/16 in. socket.
The revised instructions for installing the connector rod screw into the steering arm read as follows:
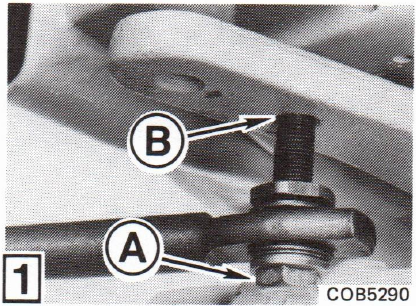
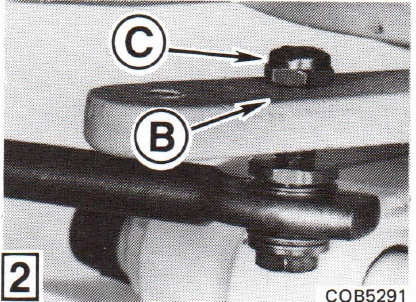
1. ⚠ Thread connector rod screw Ⓐ into rear tapped hole of steering arm Ⓑ.
2. Begin threading locknut Ⓒ onto screw as soon as enough thread is exposed above steering arm Ⓑ.
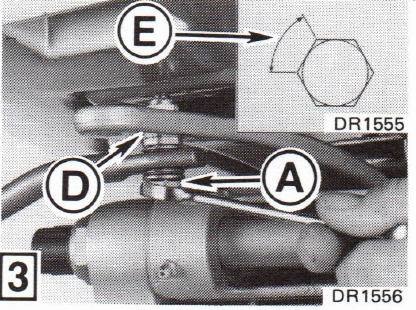
3. ⚠ Tighten connector rod screw Ⓐ until pivot rod Ⓓ is in solid contact with underside of steering arm. Tighten connector rod screw an additional 1/6 (60°) turn Ⓔ.
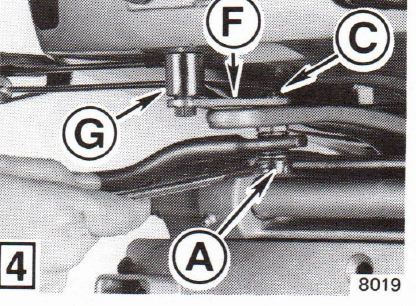
4. ⚠ Tighten locknut Ⓒ to a torque of 25-28 N·m (18-21 ft. lbs.) using OMC Torque Wrench Extension P/N 912031 and torque wrench. Hold connector rod screw Ⓐ when torquing locknut using a 9/16 in. wrench. The torque wrench extension Ⓕ must be attached at a 90° angle to torque wrench Ⓖ to give proper torque reading.
The revised procedure produces a more consistent torque than the previously recommended procedure. Installation instructions packaged with the steering connector kits are being changed. In the meantime, follow the revised procedure even though the instructions may show the old procedure.
⚠ Safety Related