OMC Service Bulletin 2356: Throttle Cable Installation and Throttle Setting

March 2000 OMC instructions for connecting and adjusting throttle cables on specified 90, 115, 150 and 175 FFI outboards.

OMC Technical Service Bulletin
Powerhead

No. 2356
March, 2000

Subject:Throttle Cable Installation and Throttle Setting
Models:90/115 FFI 2000 (SS) Suffix “R”
150 FFI 2000 (SS) Suffix “M”
175 FFI 2000 (SS) Suffix “C” & “R”
Problem:Improper running characteristics throughout the RPM range.
Solution:Perform the following steps in the designated sequence to ensure proper running characteristics.
Connect Control Cables

1 2Remove screw retaining trunnion anchor. Remove anchor. Insert shift and throttle cables into engine cover.

To gain access, move control to FULL THROTTLE position. Move engine throttle lever to full throttle position. Install throttle guide on throttle lever. Install washer and clip to secure guide.

Note Refer to OMC® FFI™ Diagnostic Software Version 1.41 User’s Guide, P/N 787087, for connection of computer to engine. See Menu Option 4 - Engine Monitoring to view window for next procedure.

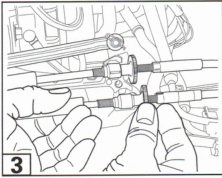
3With the remote control in NEUTRAL and the fast idle lever down, pull slack from the cable and adjust the throttle trunnion in the pocket until 0.55 volt (TPS Act) is indicated. Move control to FULL THROTTLE and check for failure code 14. If code is indicated, return control to NEUTRAL and reset voltage to 0.45 (TPS Act).
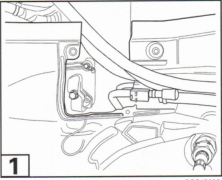
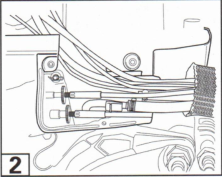
Factory figure 1Factory figure 2Factory figure 3
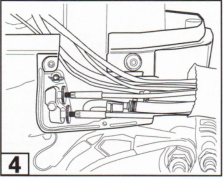
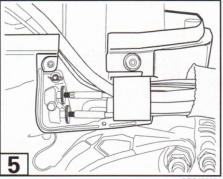
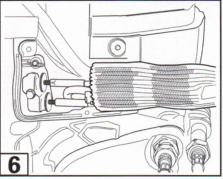
Factory figure 4Factory figure 5Factory figure 6

Turn ignition key OFF/ON; 0% open (TPS Cal) should be indicated. If not, turn key OFF/ON until 0% open is achieved.

Move control to REVERSE. Move engine shift lever to reverse. Install guide on shift lever. Install washer and clip to secure guide. Move control to NEUTRAL. Hold cable next to trunnion bracket. Trunnion must align with bracket pocket.

4Hold cables in position and install trunnion anchor and mounting screw.

5Slide sleeve-retaining ring to engine. Make sure bracket is seated against engine cover and tabs hold it in position.

6Slide ring forward and slide sleeve over retaining ring. Slide sleeve and ring into position.

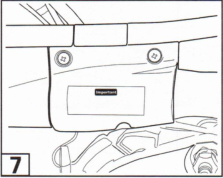
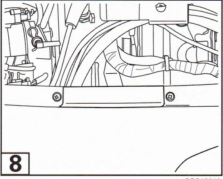
7Position trunnion cover on lower engine cover. Make sure rib in cover aligns with boss on plastic retainer. Make sure electrical cables and hoses do not interfere with cover and control cables. Tighten screws evenly and securely.

8Install cables access cover and tighten screws securely.

Throttle Setting

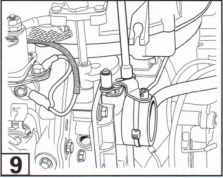
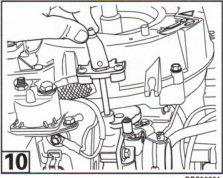
9Loosen the throttle adjustment screw.

Move the throttle arm lever until 2% - 5% open (TPS Cal) is indicated.

Hold the roller firmly against the cam and tighten the roller adjustment screw.

Move the throttle back to 0%, then bring the throttle up to 2% - 5%. The cam and roller should be touching.

Test Start-In-Gear-Prevention System

For procedure, refer to OMC Accessory Service Manual, and to Remote Control Installation Instructions.

Important After the installation and all adjustments are completed, the last step must be to recheck and adjust the throttle and shift cables. Any change to the cables, their position, routing, or support, changes the cable adjustment.

Factory figure 7Factory figure 8Factory figure 9Factory figure 10

Related marine products

eBay: OMC / Evinrude part 787087

Listings matching the part number

Affiliate disclosure: EverythingOutboards may earn a commission from qualifying purchases. As an Amazon Associate, we earn from qualifying purchases.